
[Spring] File Resource Processing
Static Resource 처리
Static Web Resource 는 서버 처리가 필요 없이 곧바로 응답을 줄 수 있다. 특정 URL로 요청이 오면 static resource 로 인식하고 바로 응답을 수행하게 할 수 있다. 방법은 아래 태그를 spring-context.xml 에 설정해준다. servlet-context.xml 은 스프링에서 제공하는 빈 객체들을 모아놓는 컨테이너라고 이해하고 있다. (틀리면 수정 바람)
<mvc:resources mapping="/resources/**" location="/WEB-INF/resources/">
여기서 mapping 은 HTTP 요청 URL이며 location 은 실제 응답 할 파일이 있는 위치다. 예를들어 http://localhost:8080/hello/resources/script/jQuery.js 로 요청을 보내면 응답은 /WEB-INF/resources/script/jQuery.js 에서 불러다 전달하는 것이다. 프론트 컨트롤러에서 수행될 수 있는 작업으로, 서버 컨트롤러에서 직접 처리하는 것보다 어플리케이션 동작 성능을 개선할 수 있다.
아래와 같이 컨트롤러에 메소드를 추가했다고 가정해보자. /bbs/ 로 들어온 GET 요청에 대해 index.jsp 를 반환하는 컨트롤러 메소드다. Return 된 값은 spring-context.xml 내부 ViewResolver 에 지정해둔 설정을 바탕으로 view 파일을 반환한다. 앞에서 <mvc:resources mapping="/resources/**" location="/WEB-INF/resources/"> 태그를 servlet-context.xml 에 추가했다면 static 파일 바인딩이 정상적으로 이뤄지는 것을 확인할 수 있다.
@Controller
@RequestMapping("/bbs")
public class BbsControlloer {

	@Autowired
	private BbsService bbsService;

	@GetMapping("")
	public String index() {
		return "index";
	}
}
파일 업로드
Spring 에서는 파일 업로드를 위해 MultipartResolver 라는 빈을 제공한다. MultipartResolver 는 encType 이 multipart/form-data 형식으로 데이터가 전송되었을 경우 해당 데이터를 Spring MVC에서 사용할 수 있도록 변환해준다. 최대 크기, 최대 메모리 사이즈, 기본 인코딩 등 <property> 태그를 통해 정해줄 수 있다. pom.xml 에 Apache Commons Dependecy 를 받아주면 사용할 수 있다. 서버에서는 일반적인 @RequestParam 을 사용하거나 Command 객체 내부에 MultipartFile 객체를 선언해 활용할 수 있다.
아래는 MultipartResolver 를 등록한 servlet-context.xml 전문이다. 해당 빈은 앞서 설명한대로 multpart/form-data 형식 데이터를 자동으로 변환해주는 역할을 한다.
<?xml version="1.0" encoding="UTF-8"?>
<beans xmlns="http://www.springframework.org/schema/beans"
	xmlns:xsi="http://www.w3.org/2001/XMLSchema-instance"
	xmlns:context="http://www.springframework.org/schema/context"
	xmlns:mvc="http://www.springframework.org/schema/mvc"
	xsi:schemaLocation="http://www.springframework.org/schema/mvc http://www.springframework.org/schema/mvc/spring-mvc-4.3.xsd
		http://www.springframework.org/schema/beans http://www.springframework.org/schema/beans/spring-beans.xsd
		http://www.springframework.org/schema/context http://www.springframework.org/schema/context/spring-context-4.3.xsd">

	<context:component-scan base-package="com.example.hello"></context:component-scan>
	<mvc:annotation-driven></mvc:annotation-driven>

	<!-- resource -->
	<mvc:resources location="/WEB-INF/resources/" mapping="resources/**"></mvc:resources>

	<!-- Multipart Resolver -->
	<bean id="multipartResolver" class="org.springframework.web.multipart.commons.CommonsMultipartResolver">
		<property name="maxUploadSize" value="104857600"></property> <!-- 10MB -->
		<property name="defaultEncoding" value="UTF-8"></property>
	</bean>

	<!-- jsp 파일의 이름만 적으면 /WEB-INF/views/ 내부에서 이름만 가지고 jsp 파일 요청 -->
	<bean id="viewResolver" class="org.springframework.web.servlet.view.InternalResourceViewResolver">
		<property name="prefix" value="/WEB-INF/views/"></property>
		<property name="suffix" value=".jsp"></property>
	</bean>
</beans>
파일 저장 시 주의할 점으로 보안 사항을 지켜야 한다는 것이 있다. 업로드 된 파일 이름을 그대로 사용해서 저장하게 되면, 추후 파일 다운로드 및 보안사항에 문제가 발생한다. 때문에 파일 이름은 숨기고 실제 파일명은 난수화 시켜서 저장한다. 이런 보안 사항을 지키기 위해 일반적으로 String fileRandomName = UUID.randomUUID().toString() 을 사용해 파일 이름과 난수가 매칭되는 테이블을 따로 설정해준다.
먼저 파일 업로드 컨트롤러를 작성한다. C드라이브 Temp 폴더에 저장되도록 파일 객체를 생성했다.
@Controller
@RequestMapping("/bbs")
public class FileUploadController {

	@PostMapping("/upload")
	public String upload(@RequestParam("file") MultipartFile file,
						@RequestParam("name") String fileName,
						Model model) throws IllegalStateException, IOException {

		// 파일 Validation
		if(!file.isEmpty()) {
			File f = new File("c:\\Temp", file.getOriginalFilename());
			file.transferTo(f);
		}

		// Model 객체에 데이터 추가
		model.addAttribute("filename", fileName);

		return "upload_ok";
	}
}
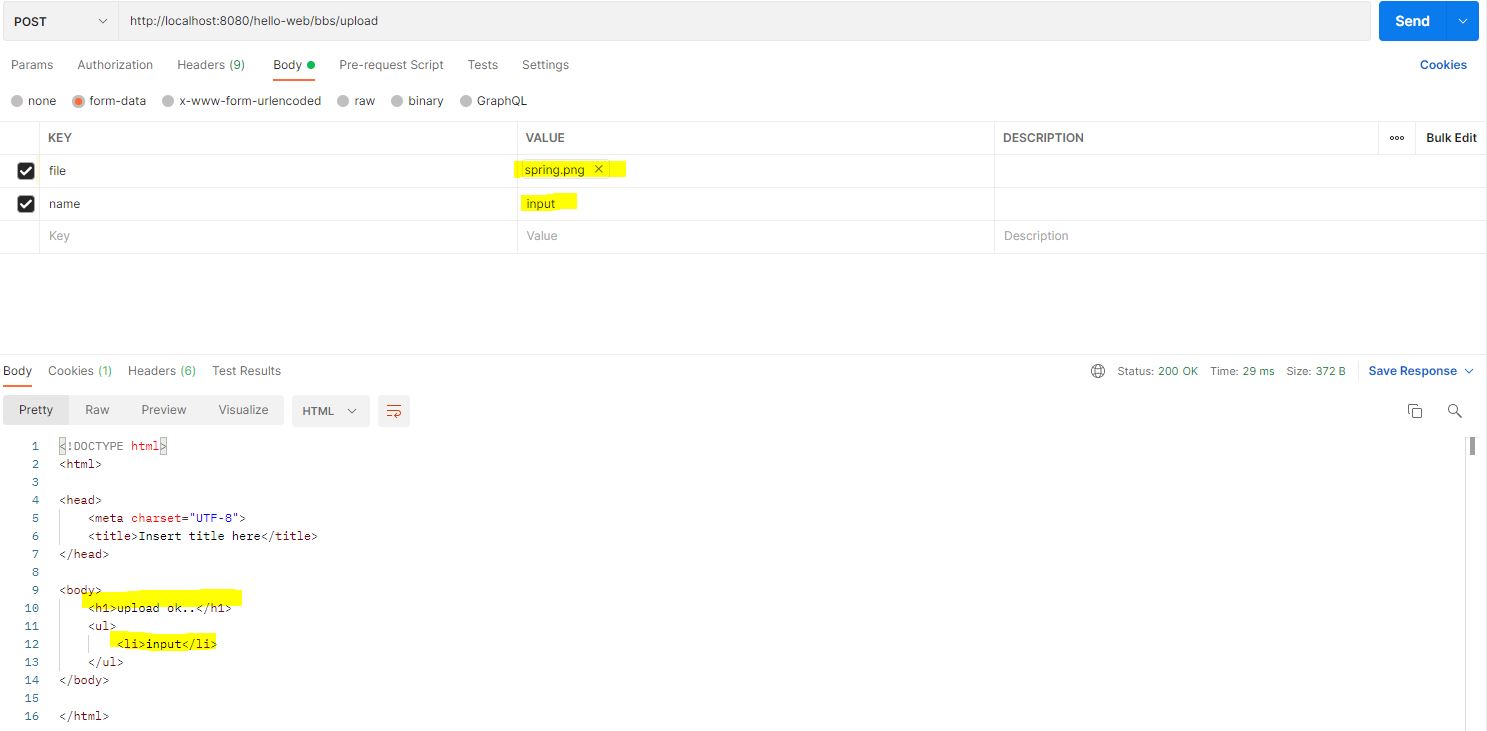
이 때, 뷰 upload_ok.jsp 파일은 아래와 같이 간단히 작성해 파일이 정확히 저장되는지 확인했다. model.addAttribute("filename", fileName) 을 통해 전달한 어트리뷰트 값을 jsp 파일 내에서 접근해 화면에 표시한다.
<%@ page language="java" contentType="text/html; charset=EUC-KR"
    pageEncoding="UTF-8"%>
<!DOCTYPE html>
<html>
<head>
<meta charset="UTF-8">
<title>Insert title here</title>
</head>
<body>
	<h1>upload ok..</h1>
	<ul>
		<li>${filename}</li>
	</ul>
</body>
</html>
끝으로 아래와 같이 Postman 을 사용해 요청을 전달하면 요청한 파일 업로드가 정상 수행되는 것을 확인할 수 있다.

Leave a comment